Front and Rear Seats
Adjusting the Front Seats
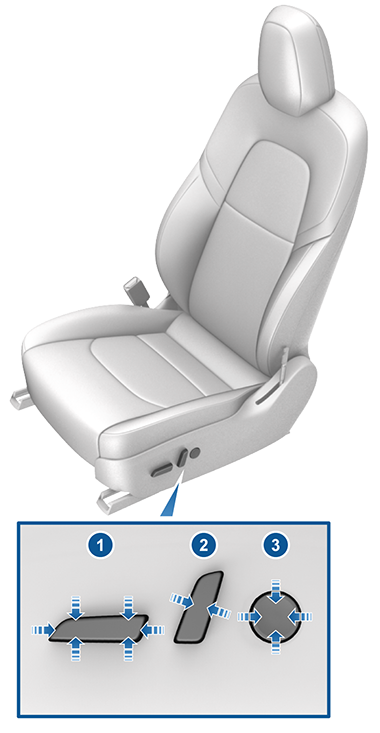
- Move seat forward/backward and adjust the seat’s height and tilt angle up/down.
- Adjust backrest.
- Adjust lumbar support (if equipped).
To adjust the front passenger seat using the touchscreen, touch and use the arrows next to the front passenger seat visualization to move the seat forward or backward.
Calibrating Seats
Correct Driving Position
The seat, head support, seat belt and airbags work together to maximize your safety. Using these correctly ensures greater protection.
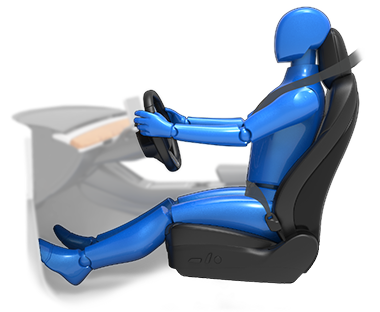
Position the seat so you can wear the seat belt correctly, while being as far away from the front airbag as possible:
- Sit upright with both feet on the floor and the seat back in an upright position.
- Make sure you can easily reach the pedals and that your arms are slightly bent when holding the steering wheel. Your chest should be at least 10 inches (25 cm) from the center of the airbag cover.
- Place the shoulder section of the seat belt mid-way between your neck and your shoulder. Fit the lap section of the belt tightly across your hips, not across your stomach.
Model 3 seats include integrated head supports that cannot be adjusted or removed.
Folding Rear Seats
Model 3 has a split rear seat that can fold forward.
Before folding, remove items from the seats and the rear footwell. To allow the rear seat backs to fold completely flat, you may need to move the front seats forward.
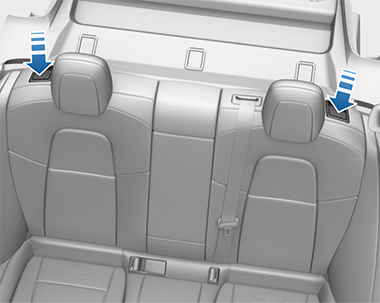
To fold a rear seat, pull the corresponding lever and fold the seat forward.
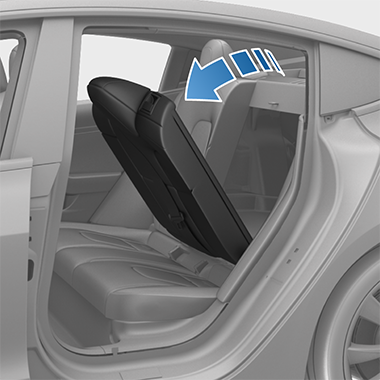
Raising Rear Seats
Before raising a rear seat, make sure that the seat belts are not trapped behind the backrest.
Pull the seat back upward until it locks into place.
To confirm that the seat back is locked in the upright position, try pulling it forward.
Head Supports
The front seats and the second row outboard seats include integrated head supports that are not adjustable.
The rear center seat includes an adjustable head support that can be raised, lowered, or removed. When occupied by a passenger that is not seated in a child safety seat, the head support should always be lifted and locked into position (so that the center is aligned with the center of the occupant's head).
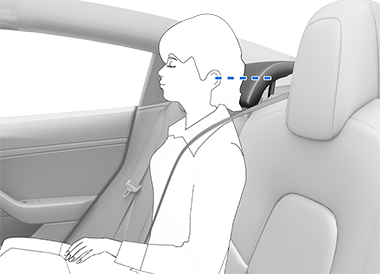
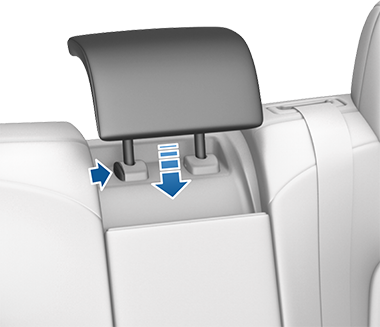
Raising/Lowering the Rear Center Head Support
Removing/Installing a Head Support
To remove the head support:
- Raise the head support as described above.
- Press and hold the button on the outer base of the right post.
- Insert a short, flat object (such as a small flat-head screwdriver) into the opening on the inside base of the left post and pull the head support upward.
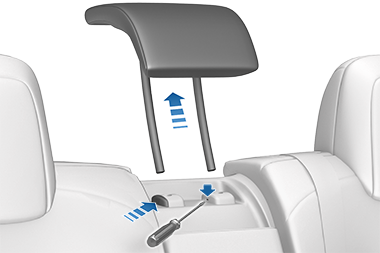
To re-install the head support:
- With the front of the head support facing forward, insert both posts into the corresponding holes on the seat back.
- Press down on the head support until it clicks into place.
- Pull up on the head support to ensure that it is secure.WarningEnsure that the head support is correctly installed before seating an occupant. Failure to do so increases the risk of injury or death if a collision occurs.
Seat Heaters
The front and rear seats operate at three levels from 3 (highest) to 1 (lowest). To operate the seat heaters, see Operating Climate Controls.
