Carrying Accessories and Crossbars
Carrying Accessories
The load that the hitch receiver can support varies based on the configuration of the accessory carrier. The maximum tongue weight—the downward force on the trailer hitch—of Cybertruck is 1,100 lbs (500 kg). The maximum weight decreases when the center of gravity (the effective center point of the load) of the accessory carrier is farther from the trailer hitch. Refer to the table below for common examples.
| Accessory | Center of Mass Distance from Hitch Pin | Maximum Load | |
|---|---|---|---|
| Horizontal Distance | Vertical Distance | ||
| 4-Bicycle carrier |
32.2 in. |
29.9 in. |
220 lb |
| Motorcycle carrier |
17.8 in. |
25.8 in. |
375 lb |
| Trailer ball |
7.3 in. |
1.2 in. |
1,100 lb |
Heavier items should be mounted more closely to the hitch pin. When using a carrier mounted to the trailer hitch to carry bicycles, skis, or other items, always check to ensure that the maximum weight is not exceeded. The maximum weight includes the weight of the accessories plus the weight of the carrier itself.
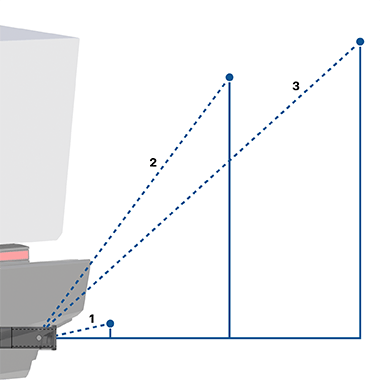
Examples of type of carrier and general distance from the hitch pin:
- Trailer (heaviest)
- Motorbike carrier (lighter)
- Four bike carrier (lightest)
Follow the instructions provided with your accessory carrier to install onto Cybertruck. Observe all regulations and legal requirements in your state/region that apply to carrying accessories.
Cybertruck includes the wiring necessary for using an accessory carrier equipped with lights (see Electrical Connections). Cybertruck also includes Trailer Mode software (see Trailer Mode).
When carrying accessories, periodically confirm that the accessory carrier and its cargo remain secure at all times, and if applicable, that the lights on the accessory carrier are working.
Installing Brackets onto the Appliques
The cross bar kit comes with 8 appliques to mount onto the roof of Cybertruck.
- Open all 8 applique doors (you can
also open the applique doors corresponding to the cross bar location if you know
where you want to install the cross bars).
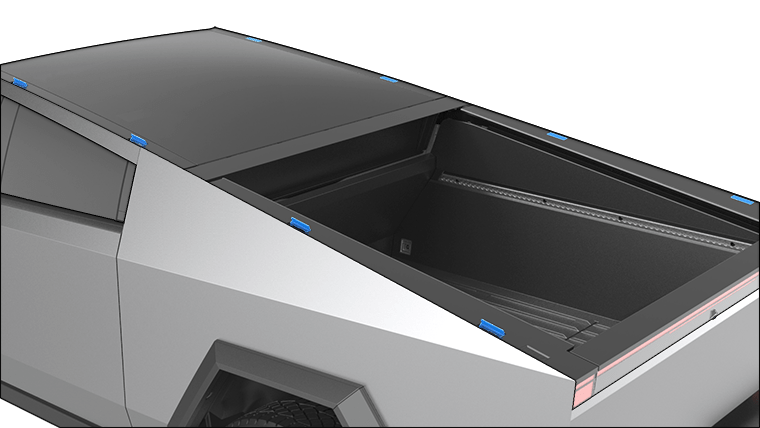
- Use the torque wrench provided in the kit to loosen and remove the nuts that are fastened to the threaded studs located within the applique doors.
- Install a bracket by positioning the
bracket so that the raised arrow on it is directed outward, away from the vehicle.
Align it with the threaded studs and set it in place.
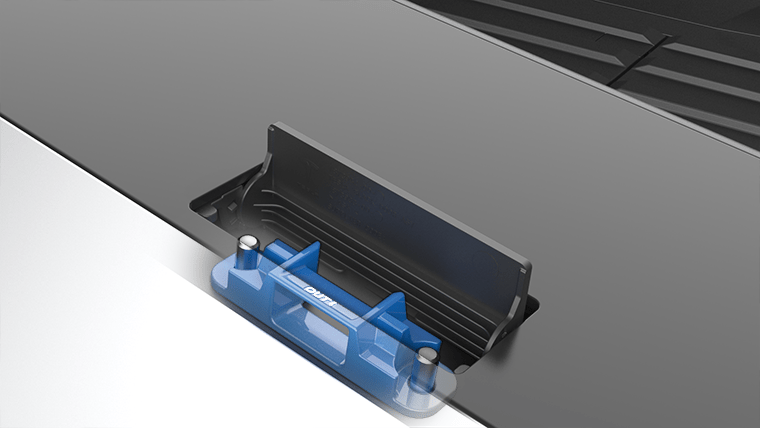
- Use the nuts that were removed in
step 2 and tighten them back onto the threaded studs with the provided torque wrench.
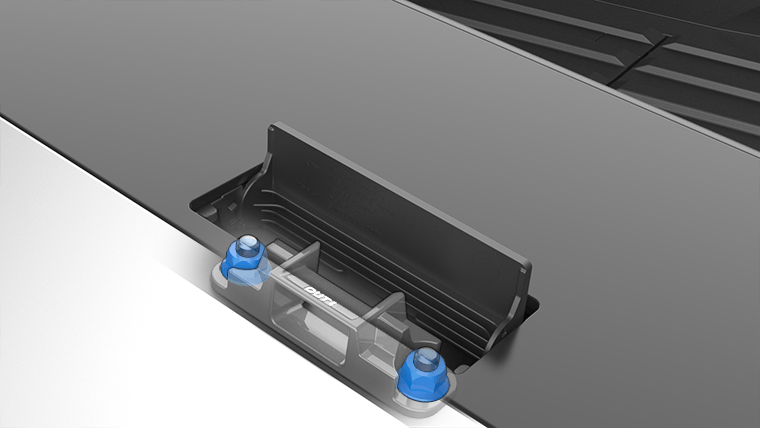
- Repeat steps 2-4 for the remaining
applique doors.NoteAfter installing the brackets once, you can leave them installed for future use, unless you want to move the crossbars to different locations on the vehicle.NoteIf a roof applique is not secured correctly, the applique could fall off of the vehicle. Tesla is not responsible for broken or missing appliques.
Installing Crossbars
To install the crossbars, once the brackets are installed onto the appliques (see Installing Brackets onto the Appliques):
- Locate the FRONT arrow embossed on
the bottom of the crossbar. The arrow should point toward the front of the vehicle.
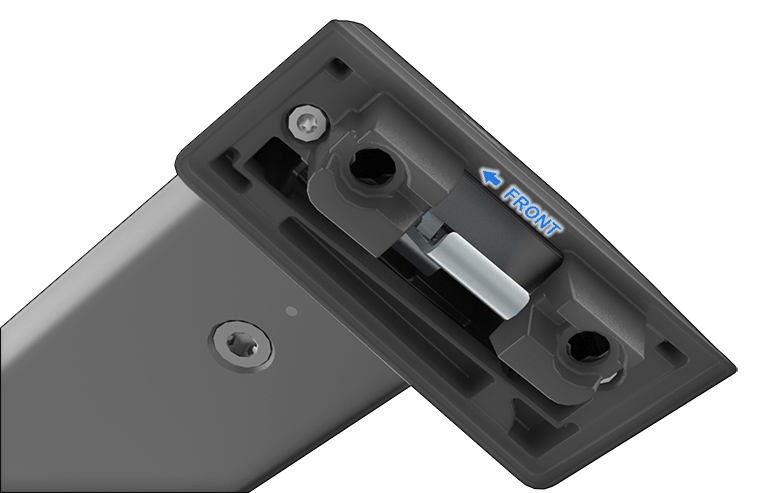
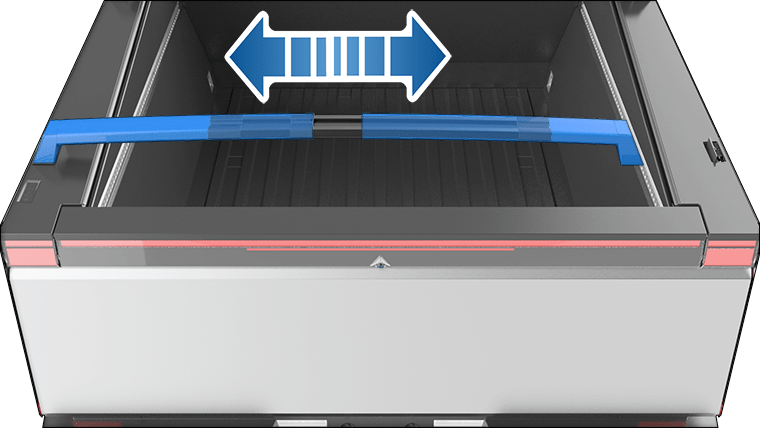
- Lower one tower (edge of the
crossbar) onto the bracket and extend the crossbar so that the other tower aligns
with the bracket on the opposite side.
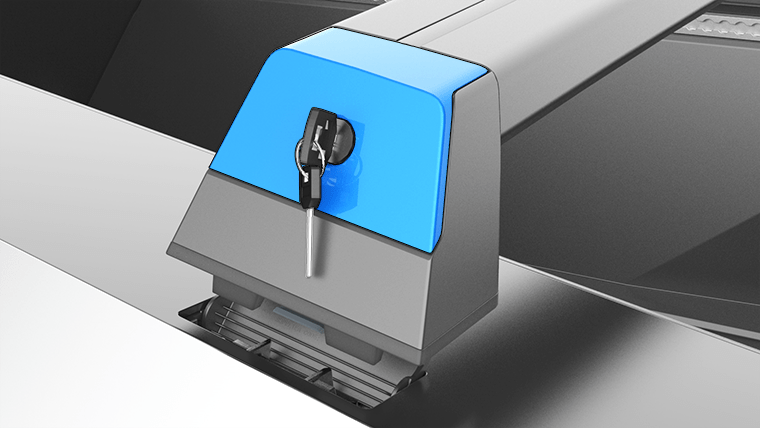
- Use the key to open the tower doors.
Push down to seat both towers.
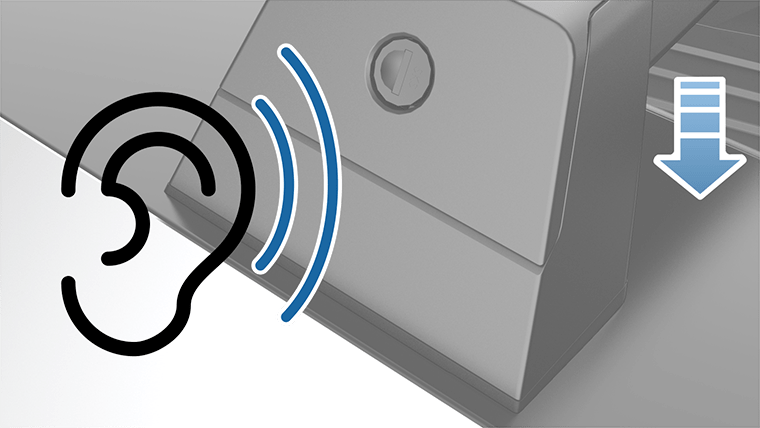
- Once the towers are completely
seated, close the tower doors securely using the key. You will hear and feel a
“click” when the tower door is closed completely. If there is resistance to closing
or if the door physically cannot be closed, the tower door is not seated properly.
Turn the key to open the door, re-position, and use the key to close to door again.
- Repeat this on the other side of the crossbar.
- Repeat steps 1-5 to install your second crossbar directly in front of or behind the first one.
- To test the secure installation of
the crossbars, push and pull them in all directions. If any movement is observed at
any of the four towers, re-seat the affected crossbars, then retest the
installation.NoteKeep the key in a dry, safe area for future use.
Weight limits
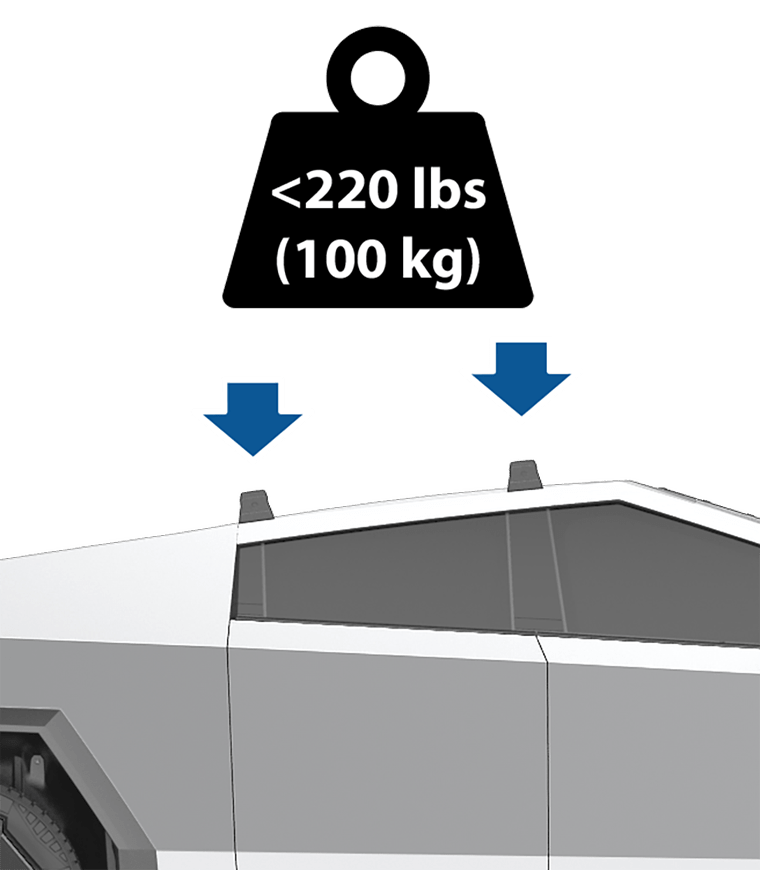
The crossbars are capable of supporting up to 220 lbs per crossbar set. See the in-box instructions that come with the crossbars for more information.
